Ethernet
Snow can emulate the DaynaPORT SCSI/Link Ethernet adapter which is an ethernet adapter with a SCSI interface. You can use this adapter on any emulated Mac model that supports SCSI.
Installation
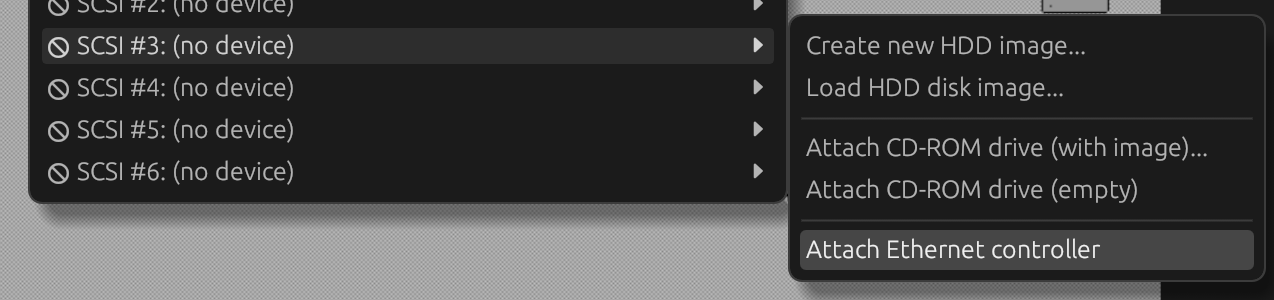
To attach the emulated Ethernet adapter, use the 'Attach Ethernet adapter' option at any given SCSI ID in the menu: 'Drives' -> 'SCSI ID #n' -> 'Attach Ethernet adapter'.
Next, you will need to install the following in your emulated system:
- DaynaPORT drivers - the recommended (and tested) driver version is 7.5.3.
- MacTCP - 2.0.6 or higher is recommended.
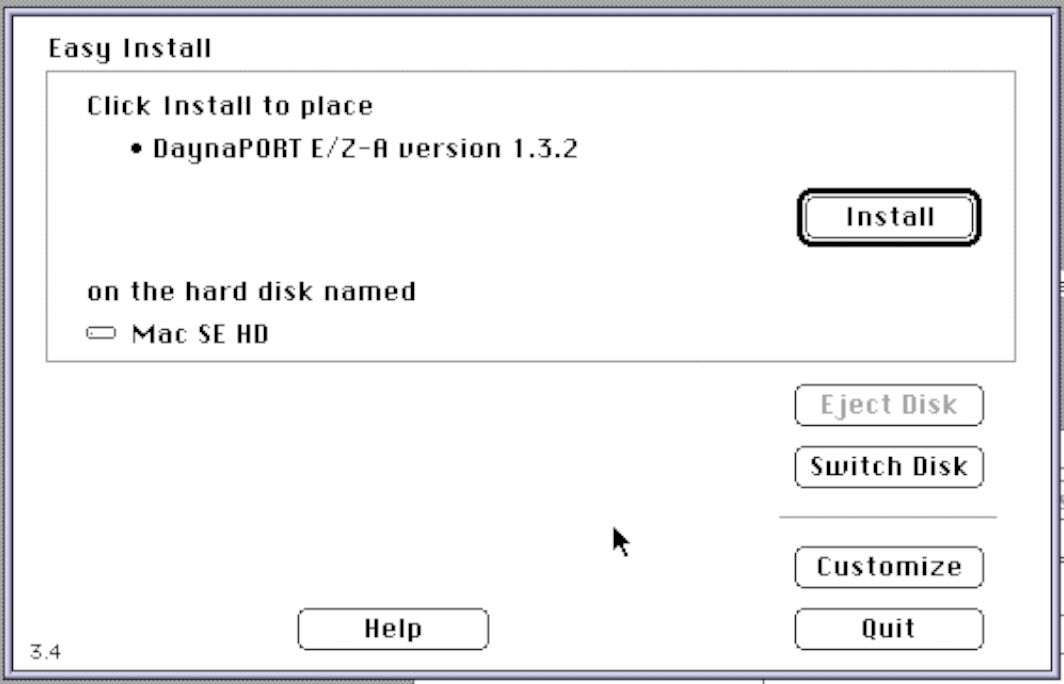
Installing DaynaPORT drivers
Use the Installer on the DaynaPORT driver disk. It will automatically select the correct driver for the adapter, which is why you need to install the drivers after attaching the Ethernet adapter (and rebooting).
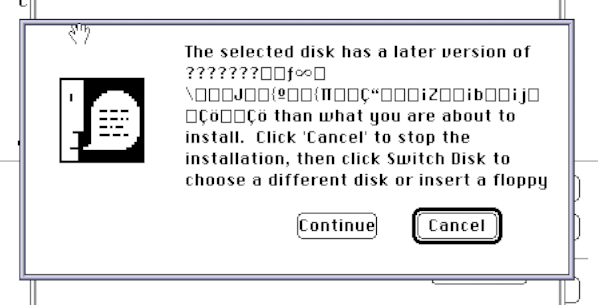
During the installation, you may see the warning below. You can simply ignore this by clicking 'Continue'.
Once the drivers are installed, reboot.
Installing MacTCP
To install MacTCP, simply drag the extension and control panel onto the System folder in your emulated system. Reboot afterwards.
Ethernet links
Snow currently supports a NAT-based ethernet link that runs in userland on the host system. This link only supports TCP and UDP connections.
You can select the Ethernet link type through the Drives menu: 'Drives' -> 'SCSI ID #n'.

Configuring the emulated system for NAT
The NAT link emulates a gateway at IP-address 10.0.0.1. Your emulated system needs to have any IP-address in the 10.0.0.0/8 network.
Snow includes a RARP server that provides the emulated system with a valid IP address, mask, and gateway. To use auto configuration, choose Server to the Obtain Address section.
However, there is no DNS emulation, so you still need to configure an external DNS server (e.g. Google or Cloudflare DNS). You can also configure the IP manually by following the mini guide below.
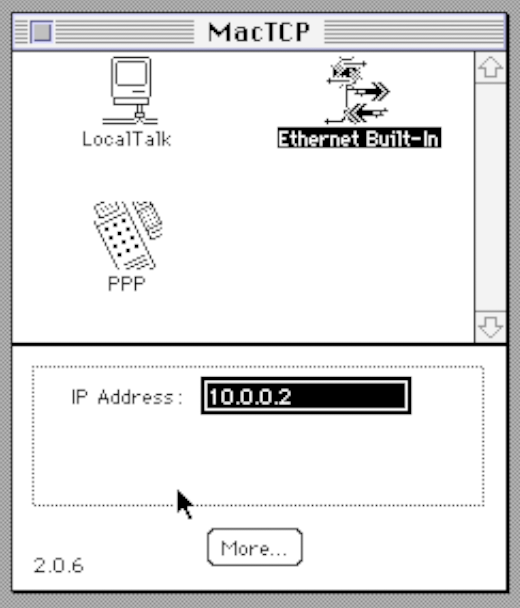
To set this up in MacTCP, open the MacTCP control panel, select 'Ethernet Built-In' and click the 'More' button to get to the following screen:
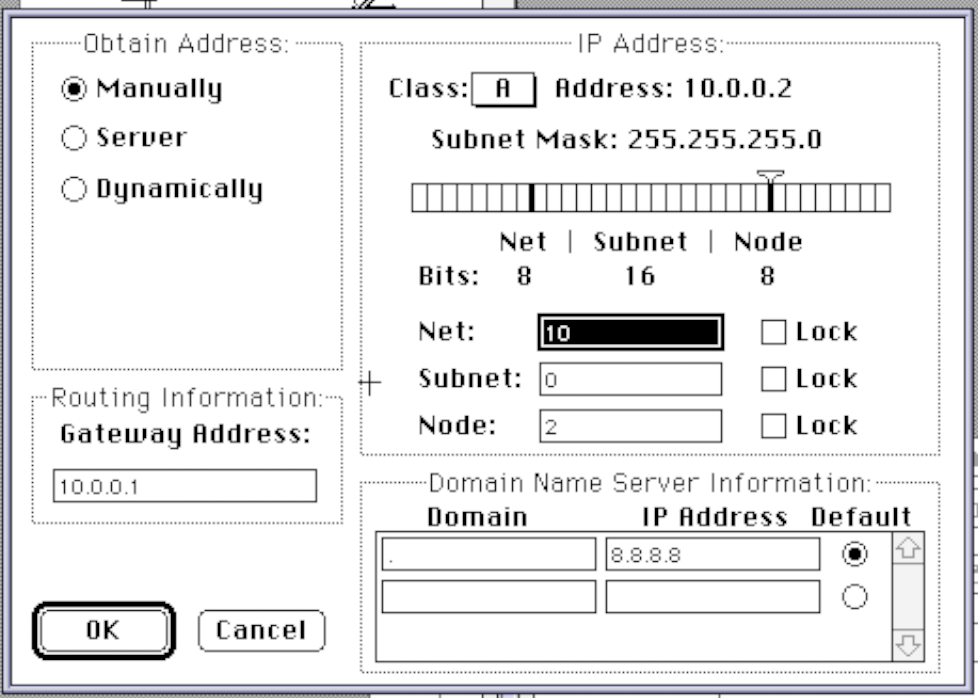
In the 'Class' dropdown, select 'A'. Enter 10.0.0.1 as Gateway address in the bottom right input box. Enter DNS information to use the DNS server of your choice. Then click 'OK'.
In this screen, enter the IP-address for the emulated system, which needs to be in the 10.0.0.0/8 network (for example: 10.0.0.2). Close the MacTCP control panel and reboot the emulated system. You should now be able to go online within the emulated system.
Stripping HTTPS connections
Snow can strip HTTPS and expose HTTPS-only sites to the emulated system in a transparent fashion. To use this, select the 'NAT (HTTPS stripping)' link mode. Snow supports TLS 1.2 and higher.
This works transparently in the same way as the normal NAT mode. To visit a website, just
visit an http link (e.g. http://www.spacejam.com/1996/) for the https site you want to
visit.
When this mode is enabled, Snow will listen for connections the emulated system establishes to TCP port 80 (http) and instead set up a TLS connection to that host on port 443 and send the plaintext back and forth, basically doing TLS offloading in a transparent fashion.
Snow waits for the first HTTP request to arrive before setting up
the TLS connection to retrieve the Host: header from the request to use in TLS Server
Name Indication (SNI). In the following plaintext stream, Snow will scan for https://
and rewrite that to http:// so hyperlinks follow the correct protocol from the
emulated system side.
Using tap interfaces (Linux only)
On Linux hosts, Snow can attach the virtual Ethernet adapter to a tap adapter, supporting all layer 2 and higher protocols. This is a feature which allows advanced users to create more complex network setups and requires more advanced networking and Linux knowledge. This also allows for the use of EtherTalk.
First, you need to create a tap interface that is owned by your user. For a tap interface to show up in Snow, the interface name needs to start with either 'tap' or 'snow'. By making your user own the interface, you do not need to run Snow as root for this to work.
For example, to create a tap interface owned by your current user:
sudo ip tuntap add dev tap0 mode tap user $UID
Then, you can select the tap interface in Snow through the menu: 'Drives' -> 'SCSI #n: Ethernet' -> 'TAP device: tap_n_'.

For some examples of how to set up a network, see Tap bridge network setups
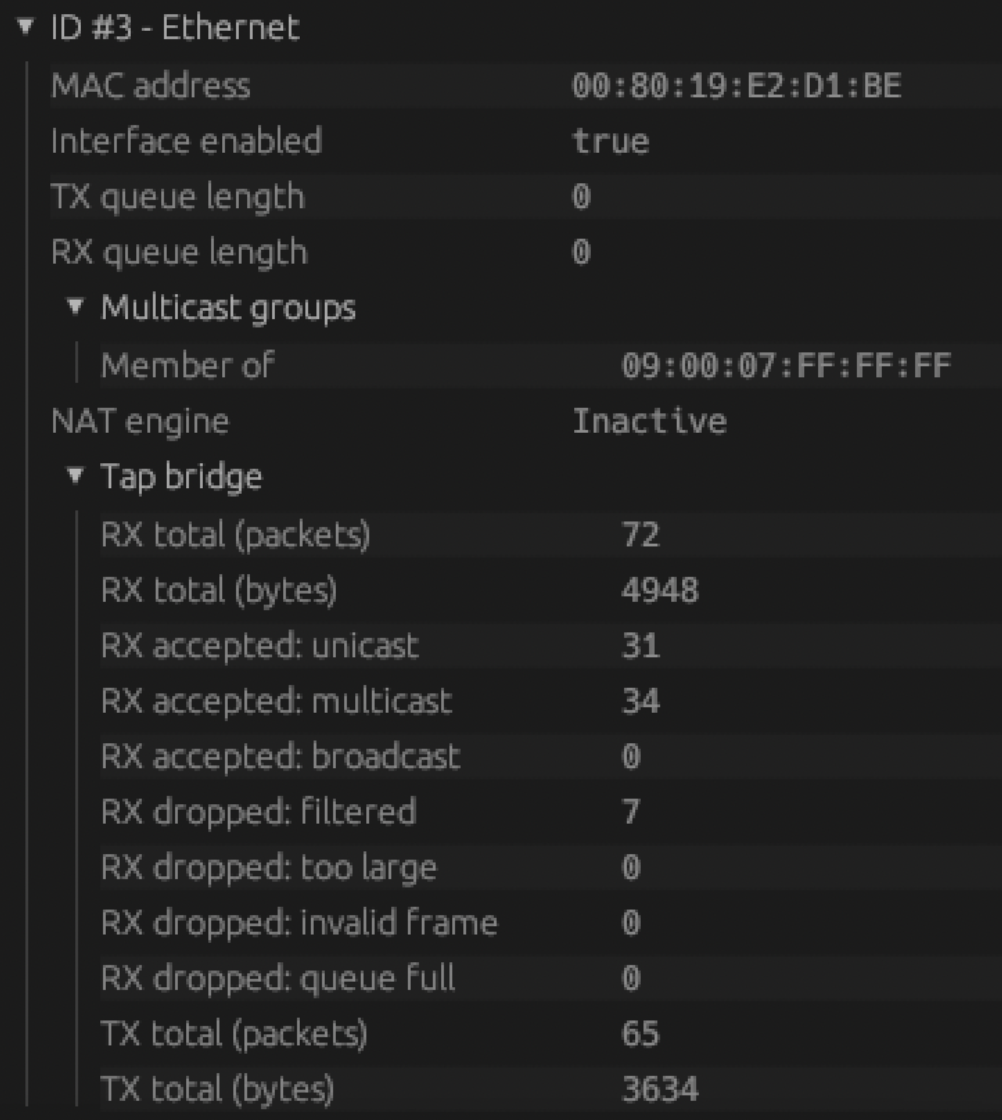
For troubleshooting and diagnostics of a tap-attached Ethernet adapter, open 'View' -> 'Peripherals' and extend 'SCSI Controller', 'Targets', 'ID #n - Ethernet'. This will show the interface status, MAC address of the emulated adapter and some statistics on transmitted/received packets.